Creating an exam paper in Microsoft Forms

Internet Geography Plus subscriptions have funded the development of these free resources. Please consider taking out a low-cost subscription to help us develop more content for Internet Geography. 

Microsoft Forms quizzes are a simple and useful way for students to complete exam questions and papers. The benefit of using Microsoft Forms quizzes for exam questions is that it’s possible to automate some of the marking and feedback. In addition to this, marking is simplified because all the answers are in the same place, saving time when reviewing answers. Finally, Microsoft Forms provides an overview of performance that is useful for evaluating a group of students’ performance and identifying areas that need revisiting.

I’ve set up an example exam paper covering natural hazards using the 2018 AQA GCSE geography paper, which you can view and copy across to your Microsoft account by clicking the links below.  The support videos below explain how the form was set up (video 1) and how Microsoft Forms can mark the paper, allocate scores, and provide personalised feedback (video 2).

If you’ve developed an exam paper in Microsoft Forms and are happy to share it with the wider community, please drop us an email.

Link 1: The exam paper how the students will see it

Link 2: Copy the exam paper over to your Microsoft Forms account (it is unlikely the images will copy across so you may need to add these yourself)

Video 1 – Setting up an exam paper in Microsoft Forms

Video 2 – Marking, allocating scores and providing feedback

Coming Soon

Video 3 – Review the performance and export to Excel

Coming soon!

Coastal Environments CPD – Erosional Landforms, Coastal Management and Fieldwork on the Holderness Coast

Creating a case study map in Google My Maps

Creating a case study map in Google My Maps

Google My Maps is a great way of collating and displaying case studies in one place. Below is an example that includes some of the case studies on Internet Geography.

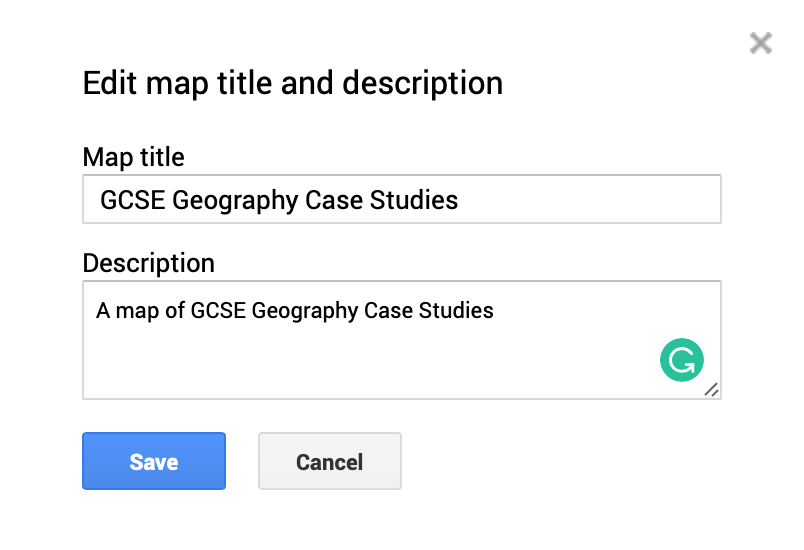
To get started on your map log into your Google account then head over to Google My Maps. Click New Map and give it a suitable title and description.

Edit map title and description

Edit map title and description

In this map, we are going to create a series of layers. This is so that we can group case studies by themes. By doing this we can filter case studies by type and display them on a base map.

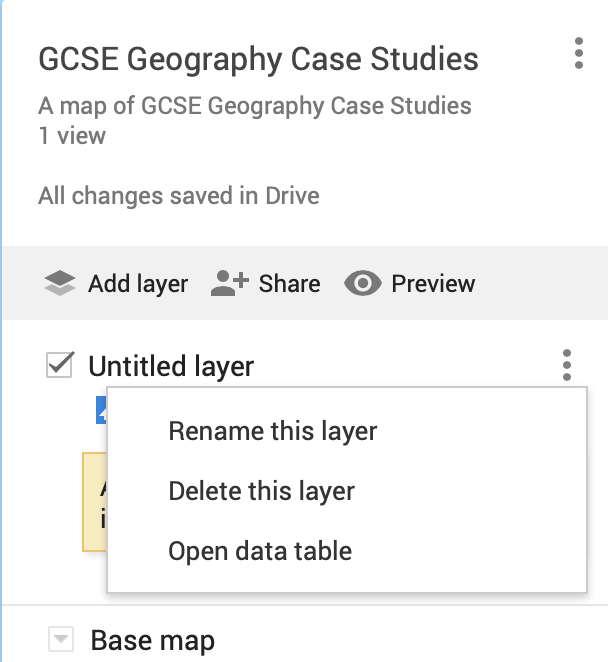
Rename the Untitled layer that has been automatically created. In this case, we will name it Natural Disasters. To do this click the icon showing 3 dots and select Rename This Layer.

Rename Layer

Rename Layer

Give your layer an appropriate name.

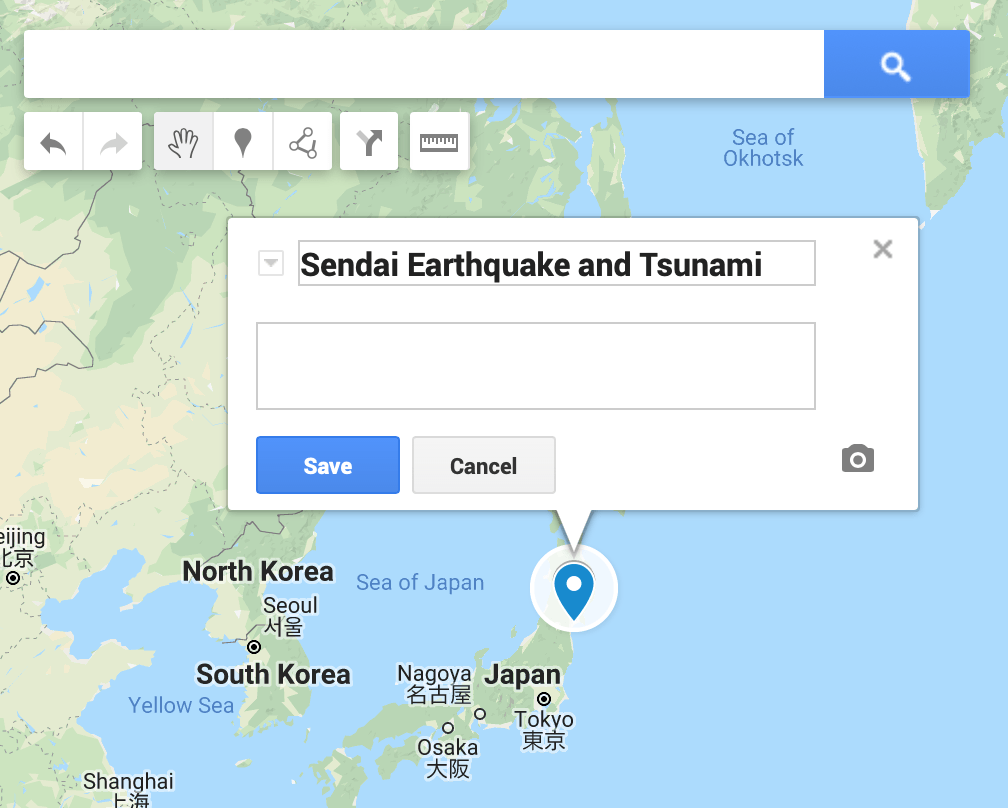
You are next going to add a marker to show the location of a natural disaster. In this case, we will add the Sendai earthquake and tsunami in Japan. To get started, locate the place where the natural hazard occurred. Then click the marker icon (it looks like an upside down droplet) then click the location where you want to place it. You can then rename the marker as shown below.

Adding a marker

Adding a marker

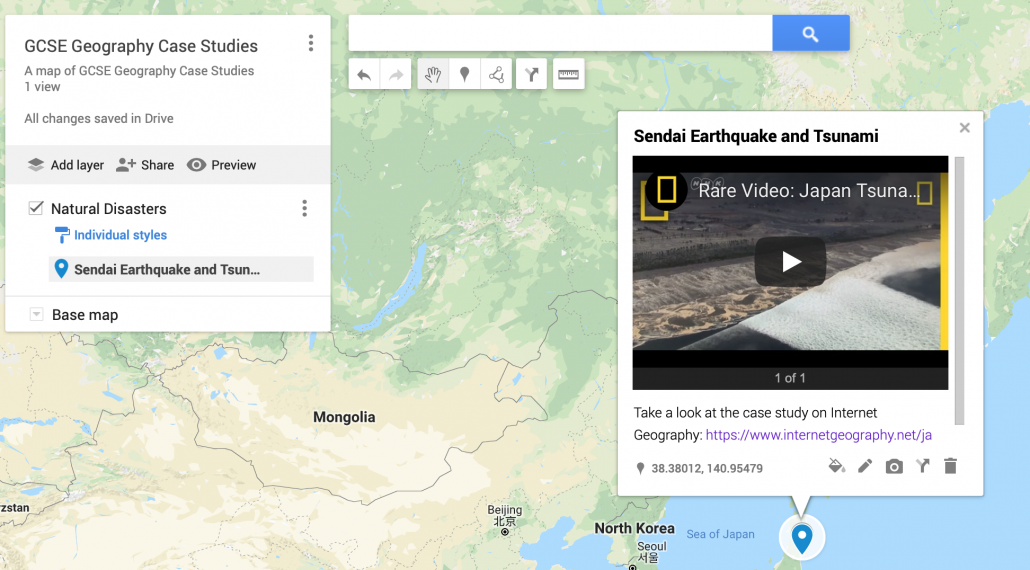
Next, you can add images and videos (such as those on YouTube) to the marker. You can also include hyperlinks to web pages that could be used for revision. Below is an example of a marker with a Youtube video embedded and a hyperlink to a case study on Internet Geography.

Marker with embedded YouTube video and hyperlink

Marker with embedded YouTube video and hyperlink

You now need to repeat this for all the case studies you want to include in this layer.

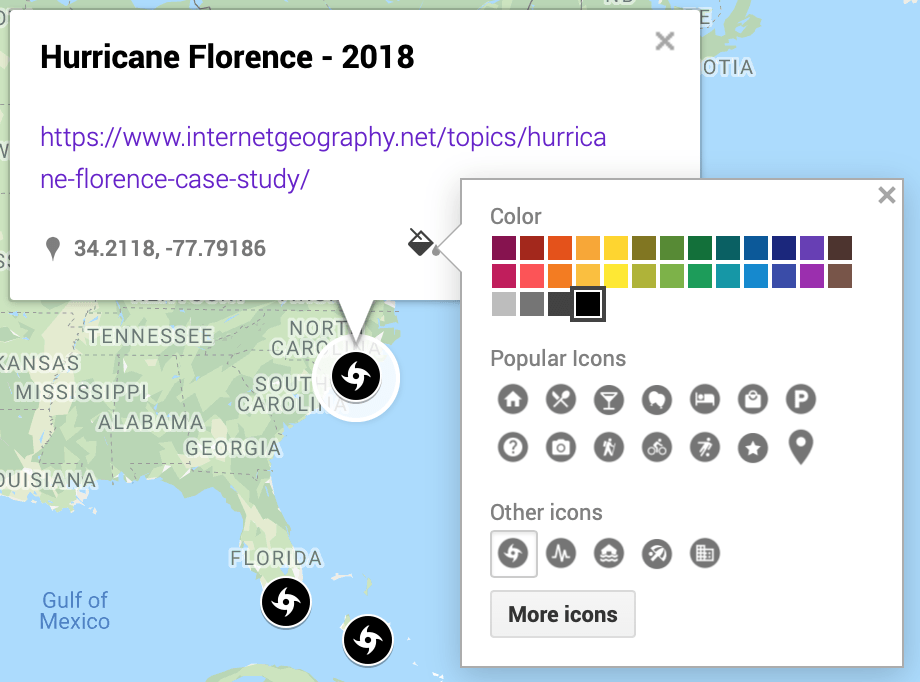
You can then create another layer and repeat the process. You can edit the colour and style of markers by theme. This will help differentiate the different markers. To do this click the bucket and select a colour of your choice, then click more icons to choose an appropriate icon.

Edit marker style

Edit marker style

You can filter your map by turning layers off to show the location of a particular category of case study. To do this de-select the tick next to the layer name.

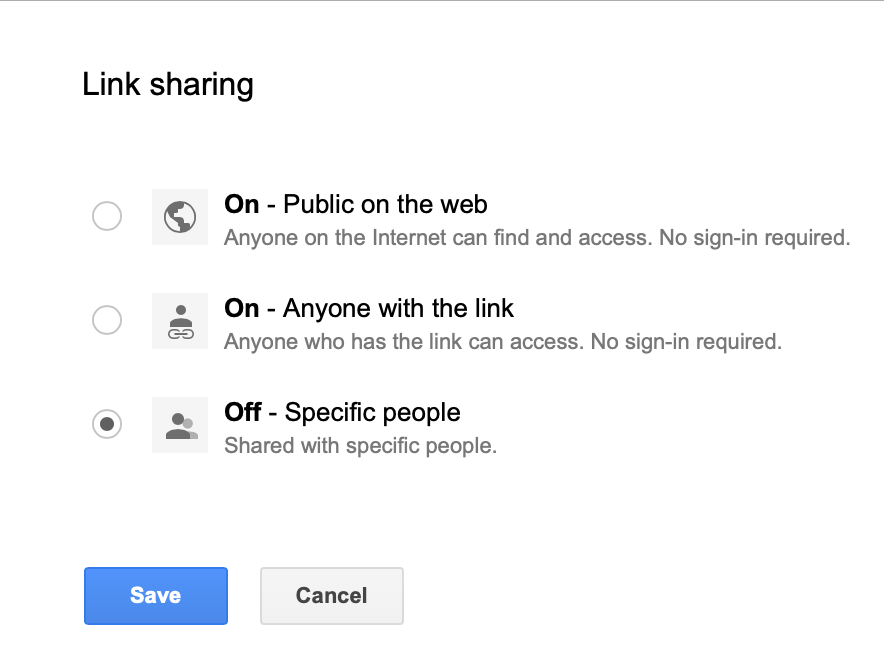
Once your map is finished you can share it by clicking the Share icon. Then click Change. Select an appropriate option. Once you’ve done this copy the link and share.

Link sharing options

Link sharing options

River Fieldwork CPD on the River Derwent

Coastal Environments CPD – Erosional Landforms, Coastal Management, Deposition and Fieldwork on the Holderness Coast

10 reasons you need earth.nullschool in your geography classroom

10 reasons you need earth.nullschool in your geography classroom – Find out why you need earth.nullschool in your classroom and how it can be used.