Map your photos using Google Maps
Using Google Images and Google Maps you can easily create a map using an album of geotagged photos. Geotagged photos are those that include data on the location they were taken. Most modern mobile phones have this feature as do some digital cameras. If you are not sure a quick search on the Internet will tell you if this option is available and how to enable it.
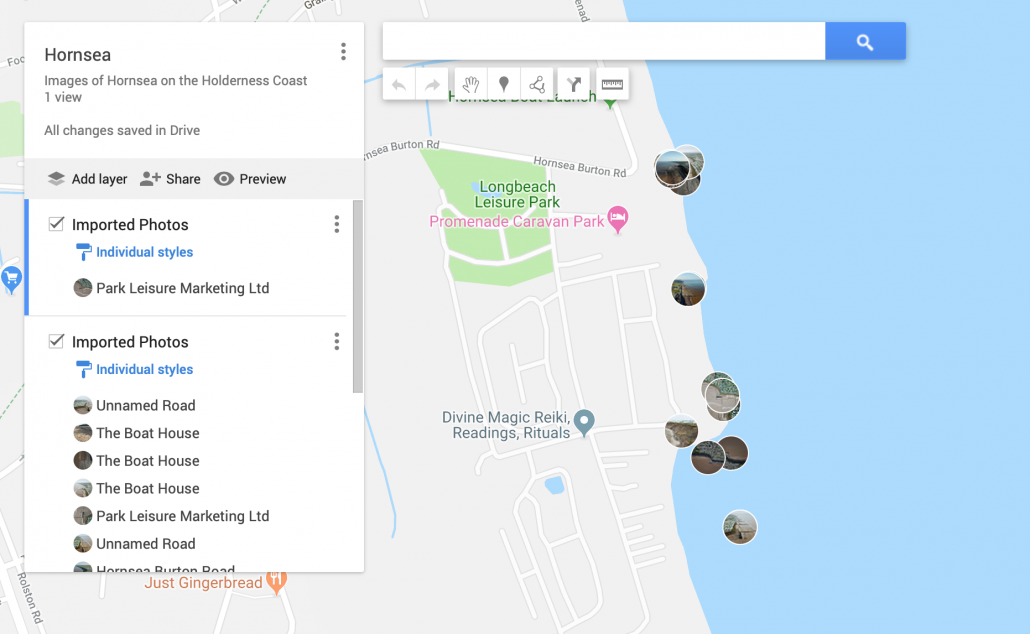
Below is a map showing the location of a number of images taken in and around Hornsea on the Holderness Coast using an iPhone and a drone.
Looks complicated? Don’t worry, it’s not! Just follow the steps below.
To begin with, you will need to upload your geotagged photos to a new album in Google Photos. To do this login to your Google account and go to https://photos.google.com. Next create a new album by clicking +Create in the top right corner, then select Album.
Give the folder a title then upload the images you want to map.
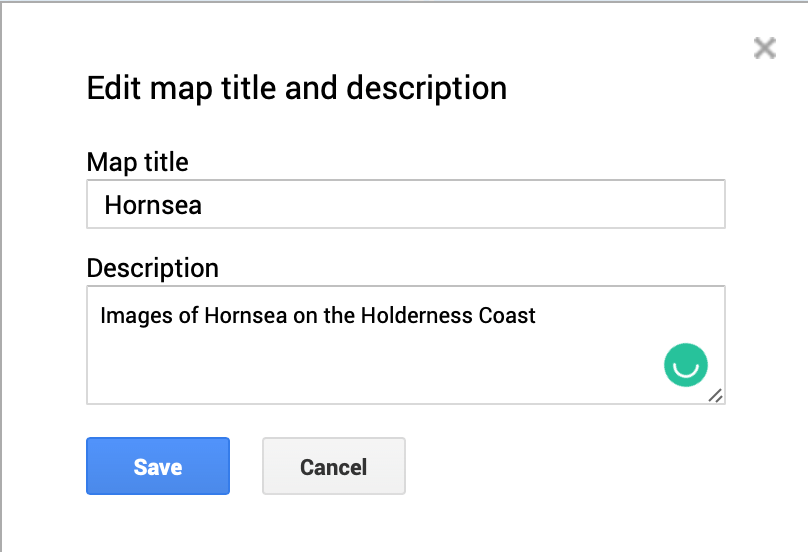
Next, go to https://www.google.com/maps/d/ and select +Create New Map (top left corner). Your new map will open and be called Untitled map. Give your image a suitable title by clicking untitled map in the top left window.
Click Save.
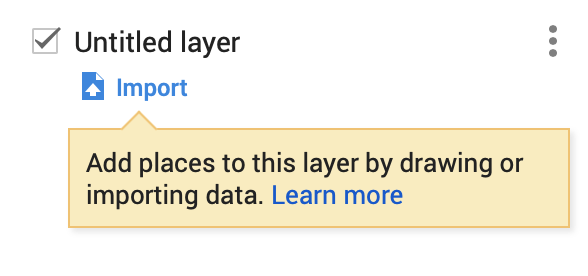
Next click Import (under the first layer which is called Untitled layer).
Click the Photo albums tab. Next, locate the album where your photos are stored. Select all the images you want to import onto the map.
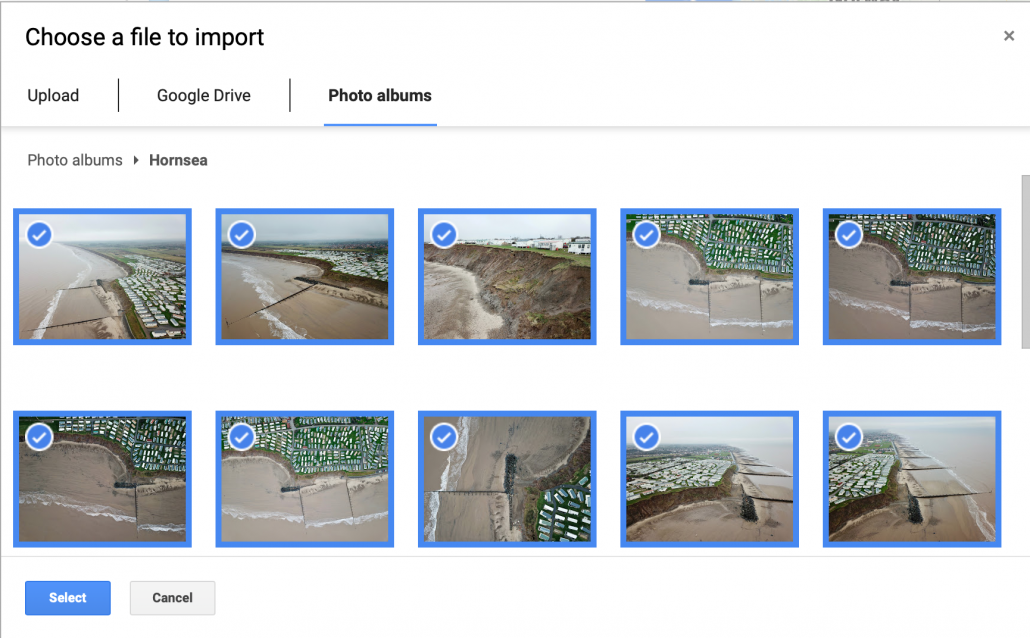
Next, click Select. The photos will then be copied onto your map.
This will create at least one layer containing your images and an icon of each image will be displayed on the map.
You will notice that each photograph has been given a title based on the location it was taken. You should go through these and rename them as appropriate. Once you’ve finished you can share your map with others by clicking Share > Change > On. You can then share the URL. You can also embed the map on a website by clicking the three dots next to the map title. Then select Embed on My Site.


How old is this article? Unfortunately this feature no longer seems to work in 2020.
Hi, I understand there was an issue on Google My Maps for a short period of time. However, it is all working now.
https://play.google.com/store/apps/details?id=com.levionsoftware.instagram_map
I’m trying to upload JPG files and I receive an error message that the selected files are not supported for upload. What files are acceptable?
If your files are named .jpeg try changing it to .jpg (and vice versa). Can’t remember which way round they need to be saved as.
Hi,
This method works great for photos taken from a drone. However, I’m trying to do the same with photos taken on an iPhone (with location services enabled when taking the photo. Tried searching about but struggling. The Photos when emailed to Windows, saved on a folder then right click properties doesn’t have a “GPS” section at all…… Bit stuck!
It might be worth trying to upload the image directly to Google Drive from your iPhone then having a go? Let us know if it works!
That seems a bit weird. Have you checked whether you have GPS enabled in your actual camera app also? Is the GPS unit itself working in other apps?
Yep, checked all the settings and used photos that show up in the “Places” album on iPhone in the locations they were taken. Swiped up on the photos and it shows the location of them.
It seems to lose this data entirely when emailing over to use in My Maps. Seems like something that really should work but I’m stuck.
I’ll keep trying though.
Try this:
1. Open an image you want to export in Photos in your iPhone.
2. Press the share icon (box with up arrow).
3. Click options (at top). Make sure location is turned on.
4. Email the file to yourself then try uploading it to see if this resolves the issue.