Using Google My Maps in Geography
Google My Maps is a great way to introduce students to online mapping before progressing to heavyweight GIS packages such as ARC GIS. Through Google My Maps students can explore the basics of cartography, share information about local communities and far-flung destinations. The map is their canvas on which they can build with points, lines and polygons, and they can go as far as their imagination leads them.
Anyone who has a Google account has access to Google My Maps. To get started head over to https://www.google.com/mymaps and log in with your Google account. If you click on Explore you can see lots of maps created by the Google community. This is a good starting point to familiarise yourself with what you can do with Google My Maps.
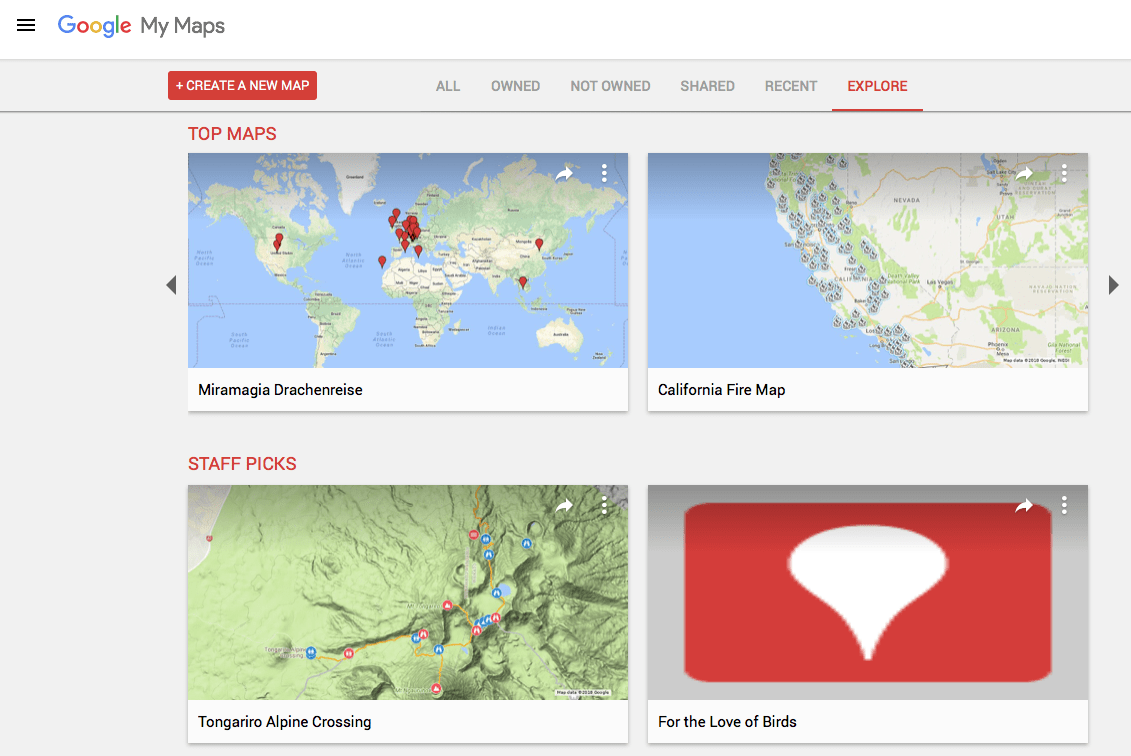
By exploring the maps you will see some of the features available within the app.
What can I do in Google My Maps?
- drop pins to show locations;
- add additional information to a pin such as links, text, images or a YouTube video;
- draw polygons on a map;
- measure distance.
Creating a map
Click +CREATE NEW MAP. Depending on your location you will be presented with a map as below.
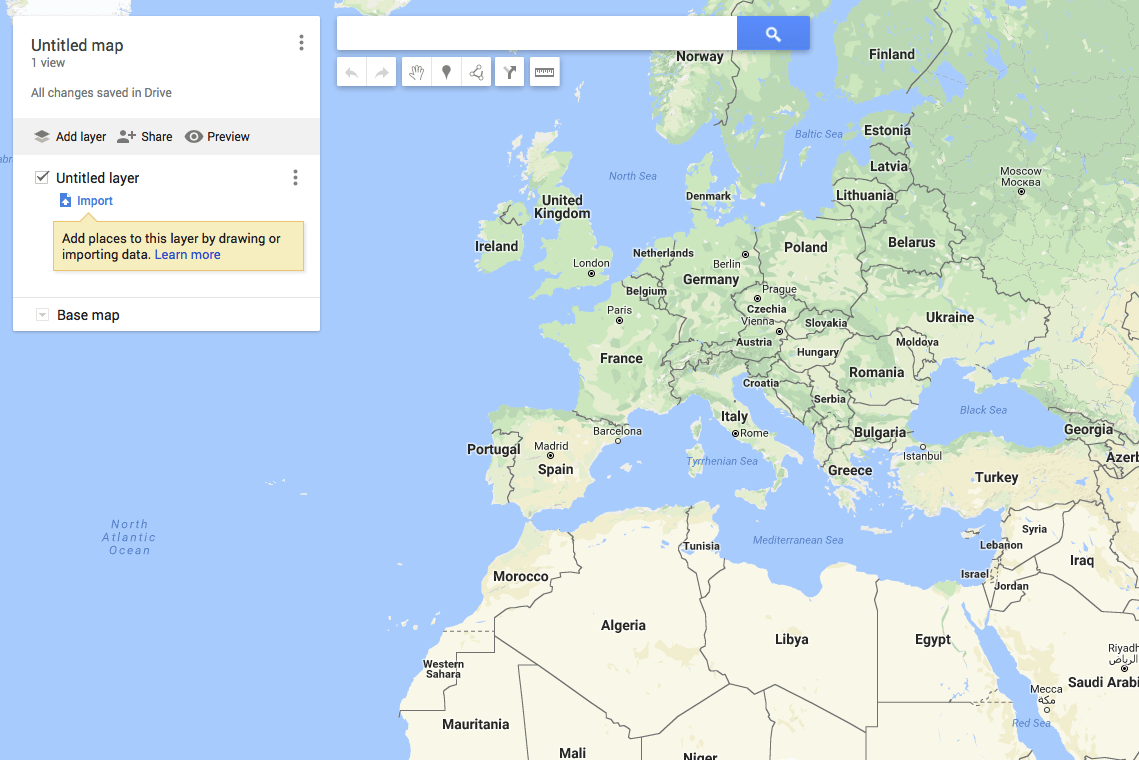
Start by giving your map a title. Click Untitled map and to give your map a name.
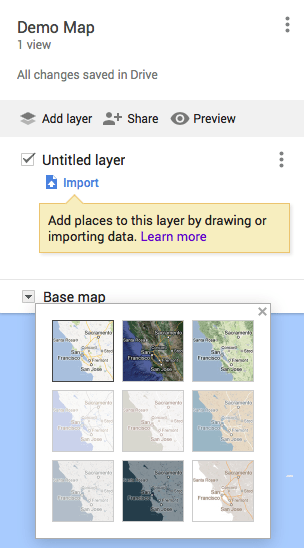
Choose the type of map you want to add information to. To do this click Base Map and select a map type.
Adding Pins
Next you can start adding pins (markers) to your map. The icon looks like this:
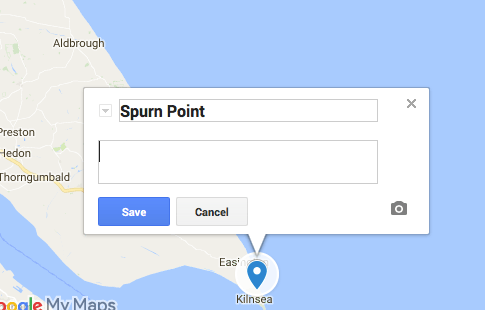
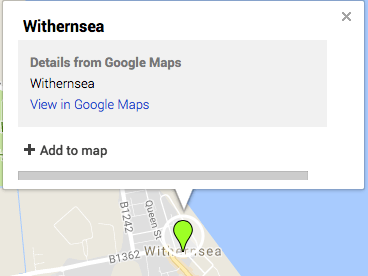
To do this click the pin icon. Your cursor will change to a crosshair. Next, click the place on the map where you want to place your pin. In the example below I have placed a pin to Spurn Point on the Holderness Coast. Give it a title, as shown below. Next you can add text in the description box. You can also add photos and YouTube videos by clicking the camera icon. When you have finished click save.
You can also add places to your map by clicking in the search box towards the top of the page and typing the name of the location you want to add. When you have found the location click the Add to map button.
You can edit your pin by clicking any of the icons in the marker box. You can change the colour of the pin by clicking the bucket icon. You can edit the content of the marker by clicking the pen icon.
Layers
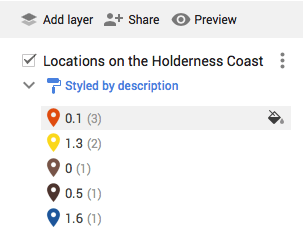
All the pins you place will go onto a layer. At the moment your layer will be called Untitled. You can re-name this to describe what is being shown on the layer.
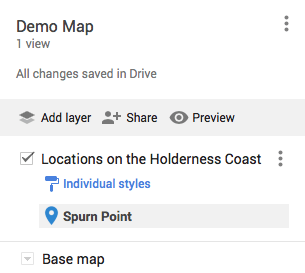
You can create new layers to show different types of information. To do this click Add Layer. Give it a suitable name. You can then add information to the new layer.
Data in pins
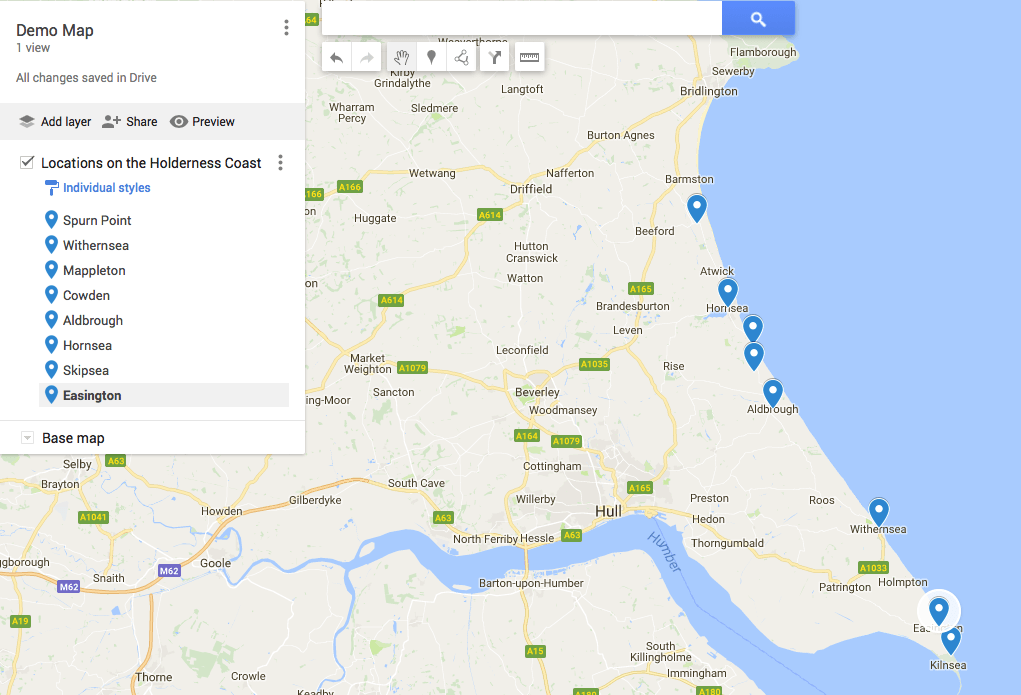
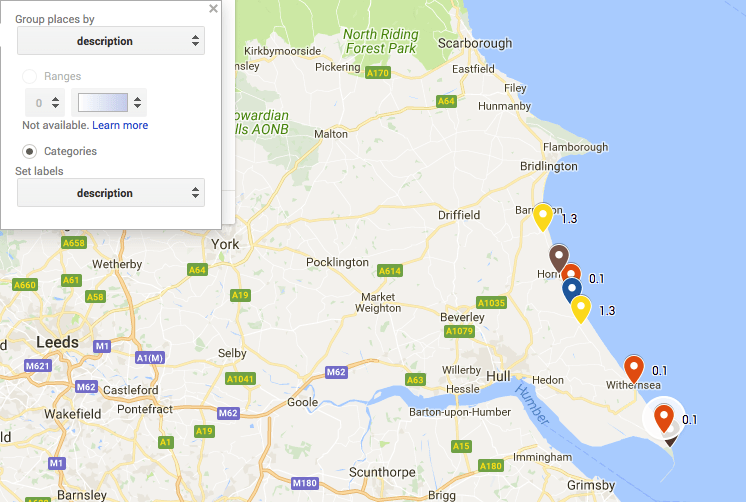
Pins can be used to graphically present data. It is possible to add data to markers to graphically present information. In this case, we are going to identify rates of erosion at locations along the Holderness Coast and set up the markers to illustrate the rate of erosion according to their colour.
I’ve added a number of other settlements along the Holderness Coast to the map.
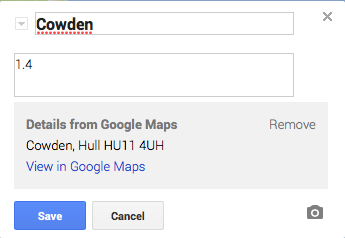
Next, in the comment box for each location, I am going to add the annual rate of erosion for each location. The example below shows the rate of erosion at Cowden.
Now all the data has been added we need to allocate a colour code to indicate the rate of erosion on the map. To do this click the Individual styles link.

Then select Style by data column: description
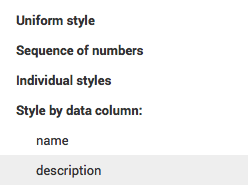
You can then set the labels by description. Below shows the map colour coded according to the rate of erosion and a label to indicate the rate of erosion.
You can change the colour of the labels by clicking the paint fill icon.
Below is a copy of the map I created.
With the techniques covered so far, students could use Google My Maps to:
- map the main features of their local area following fieldwork gathering data including photographs
- present pedestrian count data
- spatially represent data collected during fieldwork investigations e.g microclimate of a school or height of groins following coastal fieldwork
- annotate a river with data from fieldwork studies such as hydraulic radius, velocity and wetted perimeter
- label and annotate physical landforms
In the next post we’ll examine the use of polygons in Google My Maps.
Need to share your map? Take a look at our guide here.
Take look at the other Google My Maps tutorials for more ideas on how you can use the app for presenting data.
If you are looking to further the develop the use of Google Apps in your classroom or school our friends over at Cre8tiveIt.solutions can provide support and training with the use of Google Suite, Google Drive, Google Edu and Google Classroom.
Anthony Bennett


Leave a Reply
Want to join the discussion?Feel free to contribute!